
How to Crop Non-Destructively in Photoshop
Posted on January 16, 2008
 Come on, admit it. You get a little crop-happy sometimes. We all do. You may be a closet-cropper, but I’m here to assure you that it’s perfectly normal. We’ve all been in the position of cropping a little too much here and there.
The kind folks at Adobe have included a feature in Photoshop that is just for those closet-croppers out there. It’s somewhat hidden, so many beginners may not know about it. (Hell, even seasoned pros may be in the dark.)
To access this feature, just take any multi-layer file (this feature is grayed out if there’s only one layer), select the Crop tool, and make your selection around the area to be cropped as you normally would.
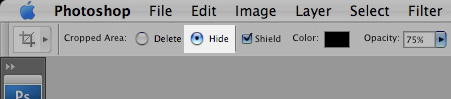
Before you crop your image, look up at the Options bar and select the Hide option, as shown below:
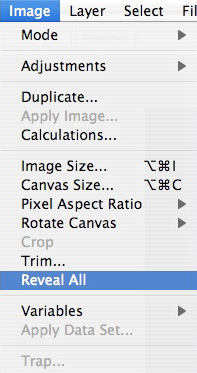
After Hide is selected, go ahead and make your crop. You can continue to work on your file, even Save and Close out of it. When you bring the file back into Photoshop, you can access all hidden areas of your file by going to Image > Reveal All.
A few things to note when using the Hide feature of the Crop tool:
- As mentioned above, your file must have more than one layer.
- The Perspective option of the crop tool will not be available.
- If you’re editing a photo, make sure to duplicate the original photo to another layer (select Background layer and press Ctrl/Cmd + J), else the hidden portion of the photo will be erased once the file is saved. As long as the original photo is copied to another layer, all the information will be retained, as shown below:

Comments
Got something to say?