
Photoshop Tips – Advanced Black and White Conversion Using Actions
Posted on April 22, 2009
 There are several ways to convert your photos to black and white inside Photoshop; quick options like the Desaturate command or simply adding in a Black & White Adjustment layer. But there are other more advanced options available within Photoshop that can give you killer black and white results.
The thing about black and white conversion is that one process doesn’t always work the best for every photo. There are several different methods because sometimes certain methods work better than others for the picture in question.
What we’ll cover here is a quick way to to create an Action that will automatically add the most popular black and white conversion techniques to your photo. We’ll combine this action with Layer Comps to give you an easy way to run through each of the conversion options to get a glimpse of what works best with your photo. I tend to lovingly refer to this technique as, Not Yo Mama’s Black and White Conversion.
Download the action below to your computer. In Photoshop, go to the Actions panel (Window > Actions), hit the Options tab in the top right corner of the panel and choose Load Actions.
Download Action (Windows Version)
 1. Document Setup
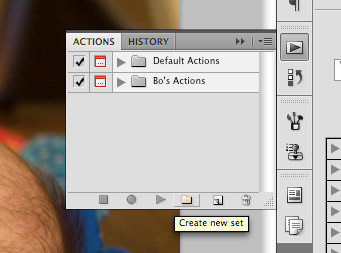
The first thing to do is open your photo inside Photoshop and then go to the Actions panel (Window > Action). If you haven’t played around with actions before, you may only see the Default Actions set inside this panel. Click on the little folder icon in the bottom right corner of the panel to create a new set and give the set a name. I named mine “Bo’s Actions”.
 2. Create Your Action
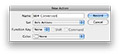
Click on the little paper icon to the right of the folder icon to create a new action. This will bring up a dialog box where you can name your action, designate which set you’d like to store the action in (make sure the set you created in step 1 is selected) and assign a keyboard shortcut and color to the action if you wish. These last settings are optional, so once you are ready to continue hit the Record button.
It’s worth noting that Actions are not time-based recordings; the action will only record changes you make to your document. So, no need to rush through this. Take your time and focus on getting the steps setup correctly.
 3. Hue/Saturation Adjustment Layer
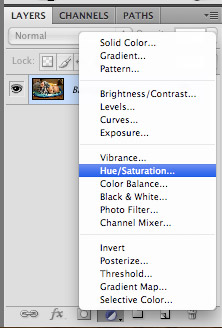
We’ll be adding on a series of adjustment layers. First up is a Hue/Saturation layer. In the Layers panel, click the icon at the bottom of the panel to create a new adjustment layer and choose Hue/Saturation from the list.
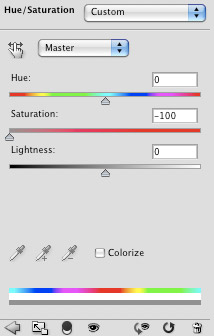 In the settings for your Hue/Saturation layer, simply drag the Saturation slider all the way to the left (-100) to completely desaturate the image. That’s all that is needed for this adjustment layer, so return to your Layers panel and click on the eye icon next to the Hue/Saturation layer to hide it.
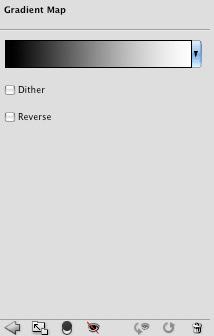 4. Gradient Map
Still in the Layers panel, click the create adjustment layer icon again and choose Gradient Map from the options. Simply make sure that the gradient is the black to white gradient which is the default. Now like you did before, return to the Layers panel and hide the Gradient Map layer.
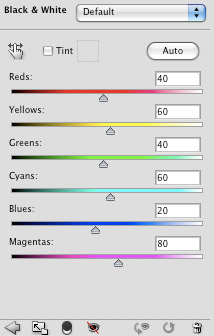 5. Black & White Adjustment Layer
In the Layers panel, click the icon to add a Black & White adjustment layer. There’s no need to change any of the settings or options for this layer as it does a pretty decent job on its own. Simply return to the Layers panel and hide the Black & White adjustment layer.
 6. Channel Mixer Layers
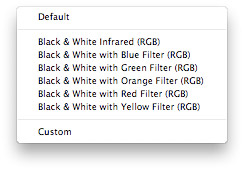
Back in the Layers panel, click to add a new Channel Mixer adjustment layer. From the main drop-down menu you’ll see an few preset options. For this first layer, select the Black & White Infrared option. Then return to your Layers panel and hide the layer.
Repeat this process for each of the Channel Mixer presets:
- Black & White with Blue Filter
- Black & White with Green Filter
- Black & White with Orange Filter
- Black & White with Red Filter
- Black & White with Yellow Filter
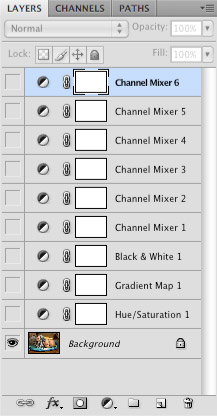 This may seem a little tedious right now, but keep in mind that you’re only going to have to do this once and your action will do all the heavy lifting from here on out. Simply make sure that after you create each new adjustment layer and select a preset that you return to the Layers panel and hide that layer. When you are done, your Layers panel should look like the illustration to the right.
7. Layer Comps
At this point, we’ve got all of our adjustment layers added to our document. However, it would be tedious to have to flip through each of the layers one at a time to see the effects of the adjustments; this is where Layer Comps come in.
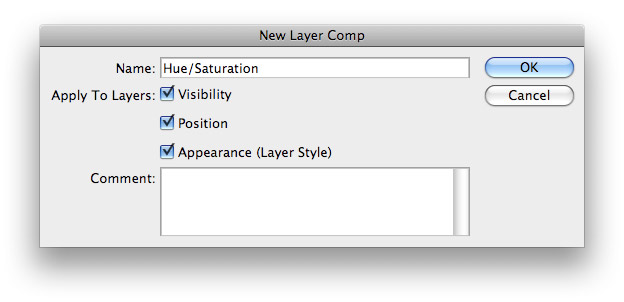 While your action is still recording, go back to the first Hue/Saturation adjustment layer you created in the Layers panel and click on the eye icon to show that layer–your photo and the Hue/Saturation layer are the only two layers that should be visible at this poing. Bring up the Layer Comps panel (Window > Layer Comps) and click the little page icon in the bottom right corner of the panel to add a new layer comp. Type in “Hue/Saturation” as the name of the comp and hit OK.
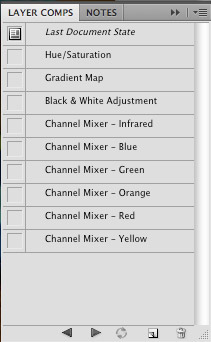 Now go back to your Layers panel, hide the Hue/Saturation layer and then click on the eye icon for the Gradient Map layer so that your photo and the Gradient Map are the only two visible layers. Return to your Layer Comps panel and add a new comp called “Gradient Map”. Return to the Layers panel and hide the Gradient Map again, then repeat the process for the rest of the layers. By the end of the process, your Layer Comps panel should look like the illustration to the right.
 8. Top It Off With Curves
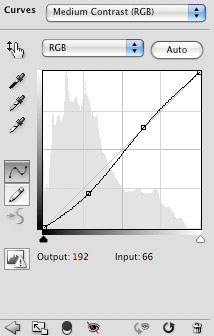
Just one last adjustment layer to add for a bit of flare. In the Layers panel, click to add a new Curves adjustment layer and choose Medium Contrast from the presets drop-down. Now return to the Layers panel and hide this layer.
 9. Stop and Play!
At this point, you can stop your action from recording by returning to the Actions panel (Window > Actions) and clicking on the stop icon at the bottom of the panel.
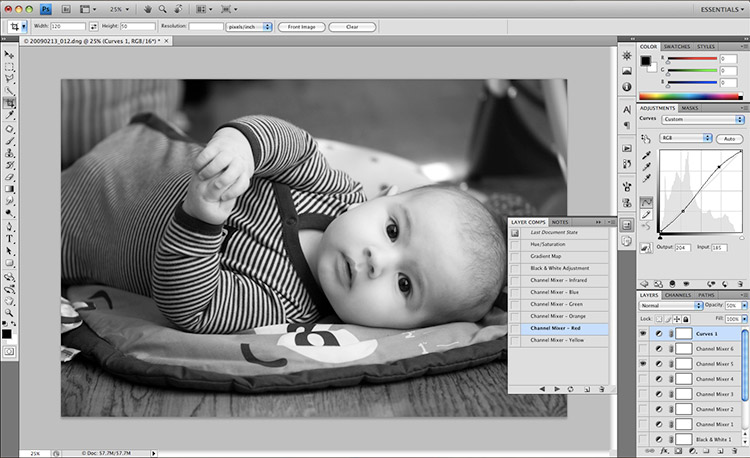
Now you can review the benefit of your hard work by pulling up the Layer Comps panel and clicking on the little box to the left of your comps to make that comp visible. You can easily scroll through each of the comps to see which black and white adjustment looks best for the particular photo you’re working on at the time.
10. Fine Tune with Curves
If one of the adjustments gets close but not quite there, there’s some fine tuning we can do. You can now make your Curves layer visible at any time. Since we added the Medium Contrast preset, it will intensify the shadows and highlights in your black and white layer. If it’s too much contrast, simply lower the opacity of the Curves layer. Still not satisfied? Pull up the Curves adjustment panel and choose another preset or manipulate the curve on your own.
Download the action below to your computer. In Photoshop, go to the Actions panel (Window > Actions), hit the Options tab in the top right corner of the panel and choose Load Actions.
Download Action (Windows Version)

Comments
Got something to say?