
How to Import Digital Pictures to Your Computer
Posted on May 5, 2008
 So, you spent all your hard-earned money on your cool digital camera and you went out and took a day’s worth of pictures. Now you want to email the photos to your family but you have no idea how to get them onto your computer easily, much less get them in an email-friendly format.
Being able to “develop” your own pictures on your computer is, to some, both a blessing and a curse. Sure, it saves you from having to drop-off the pictures at your local neighborhood Walgreens, but downloading them to your computer and cropping, adjusting brightness, and resizing are intimidating to most people.
This will be a two part lesson. First, we’ll talk about getting the pictures downloaded to your computer; then we’ll cover how to make all of the adjustments and get them into a web-friendly format that you can use for emailing and MySpacing to your heart’s content.
Most digital cameras nowadays come with software that tries to make this process easier. What most people don’t understand is that the major operating systems have technology built-in to recognize your device and assist you in downloading your pictures. This comes in handy when you want to download pictures onto your work computer but forgot your camera’s software installation CD at home.
Make the Connection
First things first, we gotta get your camera/memory card connected to the computer somehow. Fortunately we live in a time when there are several options available to us:
- USB Cable
- USB Card Reader
- Built-in Card Reader

When you bought your camera, you probably received a cable that connects from your camera to your computer’s USB port. Simply plug-in the cable to an available USB port on your computer and connect the other end to your camera. Make sure your camera is in playback mode and power it on. If you’re using a card reader, simply remove the memory card from your camera, insert it into the reader, then insert the reader into your computer.

If this is the first time you’ve connected your camera to your computer, allow a few seconds for the computer to recognize your camera and install any necessary drivers. At this point, the Camera and Scanner Wizard should appear.
The Camera Wizard will first let you select which pictures you want to download. Click Next and you’ll be asked for the location you want to store the pictures in. To minimize confusion, go to My Documents and choose My Pictures (that’s what it’s there for, after all).
You may be different, but I personally don’t like having all of my pictures clumped together loosely in one folder. I like to create a new folder for each set of pictures I import. To do this, click on Make New Folder and name it. For the sake of organization, I name my folders in the following format:
- YYYY-MM-DD – Folder Name
- Example: 2007-07-18 – Katie’s Birthday Party
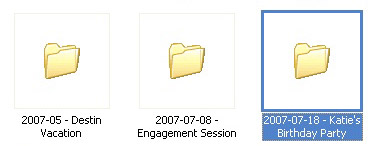
I’ve found this format to be particularly helpful when trying to hunt down certain pictures. You may find an easier format for yourself. The important thing is to develop a naming format and stick to it.
After you’ve created and named your folder, you’re now ready to import. Click Import and let the computer work its magic.
Once all your pictures are imported, this is the perfect time to back them up. Before any modifications are done, back them up. That way, you’ll always have an original copy safely stored away. You can back-up either onto a DVD, an external hard drive, a remote server, whatever. Just don’t skip this step. Back-ups are typically quick and easy to, and this simple step could save you heartache and frustration down the road. Trust me on this one.
Now you’ve effectively imported your photos from your digital camera. Continue reading part 2 of this series, Get Your Pictures Ready for the Internet, where we’ll discuss how to edit and resize your pictures and get them ready for either print or web use.

Hi there I have been trying to import some pictures from my Kodak C743 Easy Share digital camera into my computer. However everytime that I plug in the USB cable to my computer it keeps coming up with the message ‘cannot recognize device’. What do I need to do as this was working perfectly fine a few months ago when I tried it. Thanks.
My pictures were accidently deleted from the recycle bin,no backups made and all pictures are still in my digital camera. However,I cannot re-import them into my computer..My computer will tell me no new pictures need to be imported.I made a movie of these pictures but now my wife wants to send individual pictures to various family members.Can you set me straight?
i still cant download my pictures