Building Websites with Master Pages (Visual Studio)
Posted on May 20, 2009

Last week I was tasked with building a site from scratch with a very short deadline. Normally, I’d accomplish this with a WordPress install and a few theme tweaks, but my bosses didn’t want to go that route. I thought I was going to have to do things the old fashioned way (Dreamweaver, lots of typing, lots of coffee) until a friend of mine told me to take a look at Master Pages in Visual Studios.
The Master Pages feature, found in the latest versions of Visual Studio, is a very powerful tool for developing and maintaining a web site. By using a master page, you’ll be able to do to great things:
- Create a template for your site that you can use over and over again.
- Make site-wide changes in one location. This alone can save you hours of future work.
If you’re new to creating web sites, try not to be intimidated by all the jargon and fancy web development tools. All you need is some basic HTML and CSS knowledge to get started. The rest will fall into place as you go
Download and Install Visual Studio 2008 Express Edition

 The first thing you need to do is download Visual Studio Express Edition. This is a free version of the popular development tool that professionals use. There are a few bells and whistles missing in this free version, but it is certainly capable of building just about anything the average guy can dream up.
The current version of Visual Studio Express is 2008, but if you happen to already have version 2005, you’ll be fine. To download Visual Studio Express edition, go to www.microsoft.com/express. Click on the download link to see all of the various Express packages that are available. The one you’ll want for this tutorial is the Visual Web Developer. If you’re interested in the other packages available, you may want to download them all by grabbing the DVD .iso file. You’ll have to burn this to a DVD before you can use it.
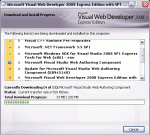
 The initial download of Visual Web Developer is quick as it’s just an installer. When you run it, you’ll begin to download the actual program. Also, you’ll have an opportunity to go ahead and download SQL Server Express. This isn’t necessary for what I’m going to demonstrate, but if you think you will tinker with database driven sites in the future, I’d go ahead and get it. The download and install process will take a few minutes (it took me about 20 minutes). A reboot will be required right in the middle of the install.
The last step will be to register your copy of Visual Web Developer. You don’t have to do it right away, you have 30 days to register. To register, you will have to sign into your Microsoft account and accept some agreements. After that, you’ll be given a registration code that you’ll copy and paste into a form located under Help > Register Product (from within Visual Web Developer).
Using Master Pages
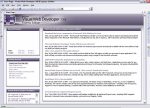
 Now that everything is set up, let’s get started. Open Visual Web Developer and take a look around. You’ll see the Start Page displayed with a few panels on the right and the typical-looking menus up top. Feel free to explore and take it all in. When you’re ready, keep reading.
 The first thing we’re going to do is to tell the Visual Web Developer that we want to create a new website. To do this, click File > New Web Site….
 A window will appear, asking what sort of site you want to create. Select “ASP.NET Web Site” in the Templates box, select your favorite programming language at the bottom left (don’t worry, we’re not doing any programming today. I just want you to know it’s there and get into the habit of choosing a language), and finally set a location to save the website. I suggest putting all of your websites into one main folder to keep yourself more organized. Click OK to proceed.
 Now you have a sort of shell for a site. On the right side in the Solution Explorer, you’ll see that several files and folders have already been made for you. We need two more folders added to the site, so right-click in the Solution Explorer where it shows the directory your site is located in (just above “App_Data”) and choose “New Folder“. Name the folder “master” and then create another new folder and name it “css“.
 We need to add a file into each of our new folders. So, right-click on the “master” folder you just created and select “Add New Item…” from the menu. In the Add New Item window, select “Master Page,” give it a good name, and click OK. Repeat the process from the “css” folder, except you need to select “Style Sheet” from the Add New Item window.
Now we have everything that we need to build our site. From here, you’re going to actually create (or paste in the code) for your site. To do this, double-click the Master Page file your created in the Solution Explorer. The will open the file so that you can edit it. Notice that there’s already quite a bit of code already written for you. Use this file to structure your site with HTML. To apply styling to your site, double-click the style sheet file you created and type (or paste) your CSS code there. You’ll reference the CSS file in the Master Page just like you always do. (Did I lose you? Click these links if you need help with basic HTML or CSS). When you’re done, continue to the next step.
Alright, here comes the cool part. At this point, you’ve got a template that all the pages in your website will use. All you have to do now is determine what sections of template will change. Most often, this will be a “content” section the <head> section. In these sections, we are going to apply a <asp:ContentPlaceHolder /> control.
 The
The <asp:ContentPlaceHolder /> control is a way to tell a web server to look in another place for a specific bit of content. In this case, we’re going to store the things that change, such as content and <head> information in another file.
So, in your Master Page, enter the following code around the sections that you want to change from page to page:
<asp:ContentPlaceHolder ID="UniqueID" runat="server"> ...your content is here...</asp:ContentPlaceHolder>
<asp:ContentPlaceHolder- This indicates the beginning of a content place holder.ID="UniqueID"- This has to be a unique name and cannot be used again by another control on that page. It's most helpful to name it according to the section it's being used in, such as "content" or "navigation".runat="server"- This piece of code must be present anytime a server control is being used.
 Next, in the Solution Explorer, right-click the Default.aspx file and choose Delete. Yes, Delete. Now, right-click at the top like you did to create the new folders, but choose "Add New Item..." select "Web Form" and before you click OK, be sure to place a check mark next to "Select Master Page." Another window will appear. Click the "master" folder on the left, and then select your Master Page on the right. Click OK.
 When your new Default.aspx page appears, you'll see that it already references your Master Page, and it already has the code written for the content place holders you created inside your Master Page. All that's left to do is to go back into your Master Page, select and Cut (ctrl+x) the code between a particular content place holder, and then paste it between the appropriate
 <asp:Content /></asp:Content> tags in the Default.aspx file.
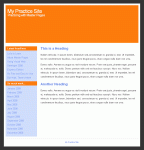
 To take a look at all your hard work, click Build > Build Web Site, then right-click the Default.aspx file in the Solution Explorer and choose "View in Browser." If you've done everything correctly, you should see your site load up in all its glory.
From here, all you have to do is keep creating new pages and putting content within the appropriate <asp:Content /></asp:Content> tags. Link them all up and publish your site to a web server.
Got programming and design skills? Advance Your Career in 2009 with a degree in a Growing Field. Start Here!


[…] Dati click >aici< pentru a continua Adauga linkul pe blogul/siteul tau<a href="http://portalul.net/web-design-development/html/creati-websiteuri-cu-master-pages-visual-studio/" >Creati Websiteuri cu Master Pages (Visual Studio)</a> Bookmark It […]
I am certainly going to download visual studio. This tut has given me renewed confidence to give it a go. Thanks for the share!
[…] View Tutorial No Comment var addthis_pub=”izwan00″; BOOKMARK This entry was posted on Thursday, June 4th, 2009 at 2:36 am and is filed under Html Tutorials. You can follow any responses to this entry through the RSS 2.0 feed. You can leave a response, or trackback from your own site. […]
Interesting tutorial but is there any way you can post your whole sample project? I think being able to look at the code in more than just screenshots would be very helpful.
Quick, short and sweet, just the way I like it. Thanks
wow1
its amazing.
i’m extreamely happy by this code.i larnt at all.
thanks.pls send me impoetent notes about it.please.
its amazing to start making website in short n simple manner.it give me confidence to sincerely work hard.thank a lot
building websites is a money maker for me sine it is the way i primarily earn dollars “
This is my first time that i visit right here. I discovered so many beneficial thing in your blog site especially it’s discussion. On the a lot of feedback on your articles, I guess I am not the only one getting the satisfaction right here! keep up a good work.
Thanks for the great wifi info, personally i think wifi should be free. I will give you all tips very soon on my blog.
Great publish! GA can be my largest earning. Even so, it’s not a a lot.
This really is 2nd incident that I’m scanning something about modifying internet sites with all the program. It appears that you’re an super professional blogger. Your post is definitely an superb example of why I continue coming again to study your excellent high quality content material that’s permanently updated.
Thanks for this post. I definitely agree with what you are saying. I have been talking about this subject a lot lately with my father so hopefully this will get him to see my point of view. Fingers crossed!
I guess I agree with what you are saying although I don’t want too :p
hello, may i find out that whether or not you mind i repost yoru article in my private weblog for the reason that i think it is extremely effective. thx in advance
hello there, I believe ur website is great. But may i know how can I going to contact you personally because i think this is a good post? Thx for your own reply ahead.
Thanks for making such a valuable blog, sincerely Kobos Mathers .
Regards
Al Khafji
I really like the style of the website. I had a peek at your source code, hope you don?t mind, to check what theme you are using. Is it it a no cost theme or do I have to purchase it?
Good point that I had never thought of before.
,,” I am very thankful to this topic because it really gives great information ‘~~
this is really a good job done..
it is fun and you are having a website sitting by your side.
i am looking very much forward for these types of stuff..
thanks a lot..
How to make effective website using visual studio 2008 ?
How to use silverlight in asp.net 3.5
How to make effective website using visual studio 2008 ?
may we have a downloadable zipped folder as an example in creating a website
it was really effective.. thanks for the tutorial…
I really like what you guys are usually up too. Such clever work and reporting! Keep up the wonderful works guys I’ve added you guys to my personal blogroll.